Build Your Own Cold Frame, Part 2: Get a Jump on the Planting Season

The design of the cold box is the most important thing to keep in mind if you want it to be an effective tool for growing crops in the winter. Though it may seem like a complex task making a structure to shield against the winter chill, it’s a lot easier than you think. You can find all of the materials you need at your local hardware store or re-purposed from what you already have around your yard.
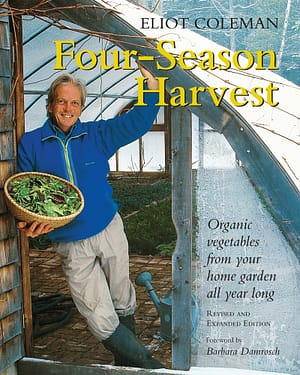
The following is an excerpt from Four-Season Harvest by Eliot Coleman. It has been adapted for the web.
Any cold frame design that protects plants will serve you well. To be enjoyable to use, however, the design must be simple, attractive, pleasant to work with, and dependable. Having tried them all, we settled on the traditional design. The simplest cold frame is a rectangular wooden box, 8 feet long and 4 feet front to back, with a slight slope to the south. We build them out of 2-inch lumber to make them strong, but 1-inch stock would be adequate. Three 8-foot boards are necessary: two boards 12 inches wide and one board 8 inches wide. One of the 12-inch-wide boards is used for the back wall. The 8-inch-wide board is used for the front wall. The second 12-inch board is cut into two 4-foot pieces, which are each cut diagonally lengthwise so that they are 8 inches wide at one end and 12 inches wide at the other.

Attach a 4-foot-long 2×2 to what is now the top. This piece extends across the middle of the frame, running front to back. You will want to cut notches in the top of the front and back walls so this cross piece sits flush with the top. This helps keep the sides spaced and also provides a handle that one person can use to lift the empty frame and carry it to a new location. If you use 1-inch wood, you might want to place more of these stiffeners across the frame.
We use standard pine or spruce for our frames. We purposely do not use treated wood, nor do we treat the frames with a preservative. Even the supposedly safe products should not be used in close proximity to food crops. Wood rots where it is in contact with the earth, however, so we attach a strip of scrap wood about 1 inch thick to the bottom edge of the frame where it touches the soil. In a few years, when this strip begins to rot, we replace it with another. The rest of the untreated wood frame will last for many years.
We also do not paint the frame. Yes, if the interior were white, it might reflect a little more light than the gray weathered wood, but paint is just one more complication. Rather than having to scrape and paint every few years, it’s best to keep things simple.
Recommended Reads
Build Your Own Cold Frame: Get a Jump on the Planting Season
Build Your Own Cold Frame, Part 3: Get a Jump on the Planting Season
Recent Articles
What’s so great about oyster mushrooms? First, you can add them to the list of foods that can be grown indoors! They are tasty, easy to grow, multiply fast, and they love a variety of substrates, making oyster mushrooms the premium choice. The following is an excerpt from Fresh Food from Small Spaces by R. J.…
Read MoreEver heard the phrase, “always follow your nose?” As it turns out, this is a good rule of thumb when it comes to chicken manure. Composting chicken manure in deep litter helps build better chicken health, reduce labor, and retain most of the nutrients for your garden. The following is an excerpt from The Small-Scale Poultry…
Read MoreIn her book, The Art of Science and Grazing, nationally known grazing consultant Sarah Flack identifies the key principles and practices necessary for farmers to design, and manage, successful grazing systems. This book is an essential guide for ruminant farmers who want to crate grazing systems that meet the needs of their livestock, pasture plants,…
Read MoreWant to start your own medicinal herb garden? Passionflower, lemon balm, and goldenseal are great places to begin! These herbs are jam-packed with medicinal properties and easy to grow in a majority of climates.
Read MoreThis long-lived perennial legume is used for forage and erosion control. Kudzu is edible with many medicinal uses and other applications. Pollinators of all kinds love its prodigious lavender blooms!
Read More


