Must-Have Tools for Successful Indoor Gardening
Who says cold weather has to stop you from gardening? With the right tools, you’ll be all set to create your own indoor garden at home.
The following is an excerpt from Year-Round Indoor Salad Gardening by Peter Burke. It has been adapted for the web.
Tools for Indoor Gardening
The list of tools you need to grow soil sprouts is short.
The first four items on the list—soil, trays, organic fertilizer, and seeds—will be discussed in part II, the how-to section of the book.
Most of the rest are items you probably have around the house. I’ll be brief here to give you a checklist before you get started.
These are the things you will definitely need:

- Trays—3-inch by 6-inch (7.6 × 15.2 cm) half-loaf foil baking trays are good to start with
- Organic fertilizer—manure compost and sea kelp
- Seeds—sunflower, pea, radish, buckwheat, and broccoli
- Measuring spoons
- Measuring cup
- Small glass cups or 3-ounce (85.1 g) plastic cups
- A small strainer
- Scissors
- 1-gallon (3.8 L) plastic bags
- 1-gallon (3.8 L) plastic juice container
- A warm, dark place
- A windowsill
- Newspapers or newsprint sheets
- Watering can (a plastic soda bottle will work)
These are the things you might want to add to your tool box:
- Small cordless vacuum cleaner
- A shelf built across the width of a window
- Two tubs or boxes to store all the stuff—a seed box and a soil box
- Compost bin
The measuring spoons are for the seeds and the fertilizers: A tablespoon, teaspoon, and a half-teaspoon are all that is necessary. The cup is to measure soil and water for the planting medium.
Using Indoor Gardening Tools
I use small cups to soak the seeds overnight; the 3-ounce (85.1 g) plastic cups work for a teaspoon and tablespoon of seeds, but they are a little tight for 2 tablespoons (29.6 ml) of seeds. You can use the half-pint Mason jar if you want something that will last forever.
I use the plastic ones in my classes because they are lightweight and compact. Anything that will hold water will work to soak seeds. Just a tiny word of caution here: Wax-covered cups will not hold water overnight; this was a surprise to me and a lesson learned.
Strainers and Scissors
A small strainer about 3 inches (7.6 cm) round, to rinse the seeds after they are soaked, is a must. It should have a fairly fine mesh, particularly if you plan to grow broccoli. Don’t be too shocked if the soak water is a little stinky; it is perfectly normal.
Next on the list is scissors. They are for harvest time. I hold a clump of greens in one hand and cut them at the bottom of the stems about 1 ⁄ 4 inch (0.6 cm) above the soil line with the scissors. I have used a knife for this job but find the scissors a lot easier to handle.
One-gallon (3.8 L) plastic bags and 1-gallon (3.8 L) plastic juice containers are for the same purpose, to measure the dry soil mix in preparation for adding water to moisten the mix. I like the juice containers best, but you can see them both in the picture of the soil box.
Indoor Gardening Tools: Highlights & Notes
The warm, dark place and the windowsill and shelves are not tools strictly speaking, but I list them because you need to make them part of your preparations for an indoor garden.
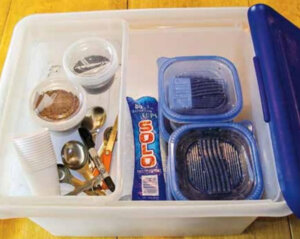
One set of “tools” I want to highlight are the two tubs—I use plastic file boxes. I debated whether these are strictly necessary.
They may not be for everyone, but they are indispensable for me. I do all my planting at the kitchen table. I can’t keep all my gear, soil, trays, and seeds in the kitchen. There’s just not enough room.
Storing Indoor Gardening Supplies
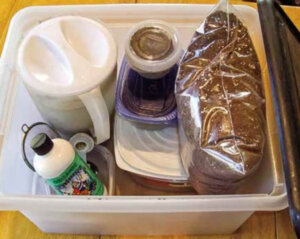
I call this one my “dirt box” or the “soil box” sometimes. And I use the other tub for the seed-starting supplies—jars of dry seeds, cups for soaking seeds.
The “Seed Box”
This one is the “seed box.” I keep a set of measuring spoons in both tubs.
It’s critical to keep the seeds separated from the moist soil to retain the viability of the seeds, so don’t use one box for both soil supply and seeds.
If I had the extra room in my kitchen, or a room where I could do all my indoor gardening, I might not need these boxes at all, but in a limited-space situation they work great.
The tubs are plastic, lightweight, and store neatly in the back hall until I need them. (If company is coming, they go up in my office. If I am really lazy, I’ll push them under the kitchen table until my wife notices them.)
Do You Need A Cordless Vacuum Cleaner?
One item that may make you scratch your head is the small cordless vacuum cleaner. It’s not a big deal.
As the sprouts grow a few seeds will drop their rather large hulls onto the windowsill around the tray. I can brush these up with my hand, but I broke down and got a little handheld vacuum to clean up the hulls, and I like it a lot.
A dustpan and a broom work just fine, too, but a handheld vacuum is a tool you might like to have and may already own.
Using A Watering Can
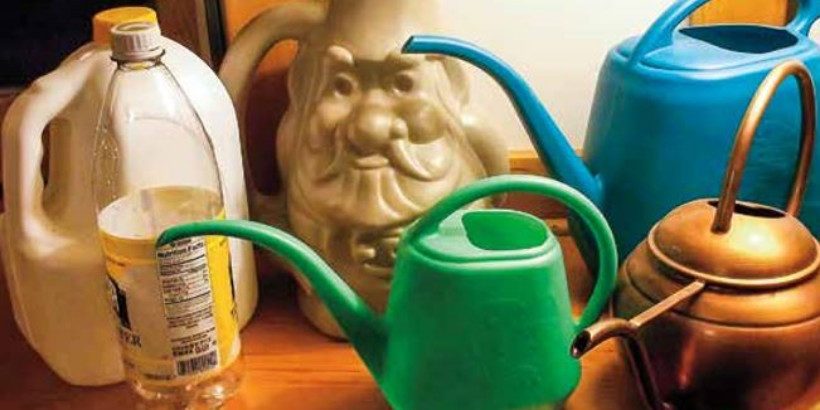
You will use a watering can every day. It can be simply a plastic soda bottle or juice jug with a handle or any kind of watering can you happen to have already. For a full shelf of fifteen to twenty small trays, you will need about a half-gallon (236.6 ml) of water.
Maybe a little less if it has been cool and cloudy, maybe a little more if the house is warm from a woodstove or heater and it has been a sunny day.
Considering Conditions
Conditions change every day. You will get to know both by the weight of the tray and the dark color of the soil if you need more water or even if you need to skip a day if the tray is very moist. Remember that you can squeeze the soil out like a sponge if you overwater.
Some of the things you do not need are grow lights, large expensive shelves, special sprouters, and a window with southern exposure. Equally important, you don’t need large quantities of water (it can be a scarce commodity for some) for growing or for cleaning your harvest. This is low-tech, low-impact gardening.
Composting During the Winter
I list a compost bin among the tools because it’s important to make provisions for treating leftover soil after cutting your greens. The soil mix cannot be reused without composting it first. I use a 5-gallon (19 L) bucket during the winter, stuffing it full of used soil and letting it sit outdoors with a lid on it.
By spring the soil is ready to use again. The roots that were left behind have decomposed, and the texture is light and friable.
The soil has to be fertilized with organic nutrients before you can plant in it again, but since I have a good-sized outdoor garden, I use that composted soil mix for new beds and general sprucing up around the garden, and some of it goes for potting houseplants.
And that’s it. All the tools you’ll need for an indoor salad garden.
Recommended Reads
Recent Articles
No heated greenhouse? No problem! Discover the secrets to thriving winter gardening without breaking the bank.
Read MoreWintergreen is the stunning evergreen groundcover that’s a game-changer for your garden! It’s cherished for its aromatic leaves, vibrant fall color & bright berries.
Read MoreGrow winter carrots for a sweeter & more flavorful harvest! Ditch the bland, store-bought carrots this winter! Grow your own winter carrots for a sweeter and more flavorful twist 🥕🥕
Read MoreWinter is coming… but that doesn’t mean you should put away those tools just yet. Extend the growing season well past the first frost!
Read More

