The Art and Joy of Collecting Seeds

It all starts with a seed. Collecting seeds from your plants will propagate more life from what you already have.
Different plant species require varied methods of seed collection. Below are some tips to help you understand plants’ specific wants and needs when collecting their seeds!
The following is an excerpt from The Ecological Gardener by Matt Rees-Warren. It has been adapted for the web.
Collecting Seeds: Getting Started
Collecting seed is easily one of my favourite gardening tasks, as I love to look at the minuscule seeds in my hand and wonder how nature transforms from just one seed into the mature plant standing before me.
Once you have collected the seed, you must decide where you’re most likely to sow it next, as this will influence how the seed should be kept.
In nature, the seed will lie on the ground from the moment it’s released to wait for germination in the spring or maybe even many years hence, until the right conditions arise.
Scattering Seed
We can replicate this by simply broadcasting (scattering) the seed, still attached to the stems, where we wish them to grow without even needing to collect the seed at all – this works well for biennials like foxgloves.
Or, we can collect the seed in the way described in Collecting Seed and choose to either broadcast it in the autumn or hold some back for seeding in the spring. If so, some knowledge of seed dormancy is required.
Weather Considerations
Many wild species produce seeds that depend on particular weather patterns and events in order to germinate at the optimum time for their survival.
These include frosts, heavy rains, low light levels and fluctuating temperatures.
Dormancy is an evolutionary adaptation that prevents seeds from germinating if these conditions are not met, so if we store seeds inside and try to sow in the spring, they won’t produce plants.
Stratification and Scarification
Therefore we must use a process called stratification in order to replicate this wild dormancy period.
The best way to achieve this is to place the seed within a slightly damp medium, such as very gritty compost or damp paper, seal it in a jar and place it in the fridge or freezer for a period of time – generally 6–12 weeks. Some species require further manipulation, called scarification (see table 3.3).
This involves breaking the hard outer husk of the seed by either cutting or crushing, then allowing the internal embryo to break out and germinate.
Finally, if we are only seeking to store the seed, say until sowing the following autumn, then it’s best to keep the seed completely dry in a sealed jar in the fridge or a dark cupboard.
Sowing Seeds

Collecting seed is one of the great pleasures of the gardening year.
If the seed has been through the aforementioned processes, then come late winter or early spring it can be sown into pots or trays in a greenhouse or on a windowsill. If the seeds are small, then broadcasting them into trays is the most effective.
When they break through and form seedlings, you can thin out around half to allow the others to grow strong and healthy. As these seedlings grow bigger, tease out and place them into a small pot to grow on further.
If the seeds are large enough to handle individually, place them one by one into small pots and grow on until they can be transplanted into larger pots or out in the ground.
Remember to use low-nutrient soil in the beginning and move progressively up into higher nutrients as the plants progress – for example, from leafmould and sand to compost and loam.
Collecting Seeds
Collecting seed isn’t as easy as it seems; it takes timing, experience and judgement to collect at the perfect stage of ripeness.
1. Once the plant has flowered, watch for the stem and the seedhead to brown and ripen.
2. Collect on a dry day. Cut the whole stem off with the seedhead attached and place in a paper bag or something similar.
3. Take the stem inside and carefully extract the seeds on a table with white paper spread out on top – seeds can be small so the paper will help you detect them when they fall.
4. Once you have released all the seeds, collect them up and place them in small envelopes or sachets, then label them.
Recommended Reads
Recent Articles
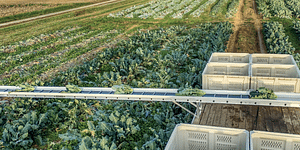
So you want to start reaping your harvest, but you’re not sure where to start? Learn how to break down the options of harvesting tools!
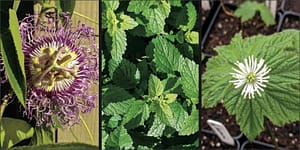
Read MoreWant to start your own medicinal herb garden? Passionflower, lemon balm, and goldenseal are great places to begin! These herbs are jam-packed with medicinal properties and easy to grow in a majority of climates.
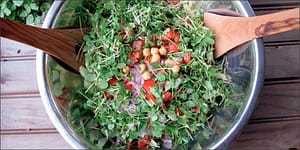
Read MoreDoes the cold weather have you dreaming about fresh greens and colorful salad? Grow and harvest sprouts indoors to make those dreams a reality! Follow this quick start guide to year-round greens for fresh salad greens in just a couple of weeks! The following is an excerpt from Year-Round Indoor Salad Gardening by Peter Burke. It…
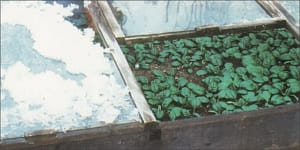
Read MoreAre you ready to get a jump-start on the gardening season? With a cold frame, you can get started now. A cold frame harnesses the sun’s heat before it’s warm enough to let unprotected seedlings growing outside. Essentially, it consists of a garden bed surrounded by an angled frame and covered with a pane of…
Read MoreSprouts are easy to cultivate, mature quickly and pack a nutritional punch! You can make nutrient-rich sprouts from all kinds of edible seeds in your kitchen.
Read More


