From the Garden to the Bread Basket: Rosemary Bread, Scones and Stuffing

Rosemary bread is the perfect compliment from cream cheese to strawberry jam to squash soup! Indulge in the trio of recipes below from rosemary bread, rosemary walnut scones to rosemary stuffing. And be inspired by this delicious guide and a pious devotional to the wonderful, awe-inspiring world of sourdough. The results are quite fantastic: bread that bites back, heels worth chewing on, and scraps worth toasting.
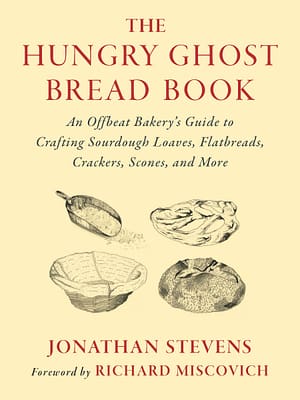
The following is an excerpt from The Hungry Ghost Bread Book by Jonathan Stevens. It has been adapted for the web.
Even a bad day baking beats merely making dough
Every time a baker refreshes their starter, every time flour and water mix to make a dough, every time a round is shaped and watched over and carried to the mouth of the hearth, every time an oven gives off the aroma of baking bread and draws hungry people to its warmth, the Neolithic Revolution is renewed. For over ten thousand years we humans have been grinding grain, making slurries, and coaxing them closer to the heat so there will be something good to eat together. Bread is the plate, the napkin, and the bulk of almost any traditional meal.
As many have pointed out, the very word companion comes from the Latin root panis, or bread. So, “company” was who you broke bread with. That is why the Neolithic Revolution still needs to be defended to this day: it represents an oasis between the nomadic tribalism of the past and the technofeudalism of the seemingly inescapable future. If we are to offer our friends, our families, and our neighbors (of any persuasion) a gift of substance, fresh bread will be always be a great place to start.
As good as it might be, a loaf can be appreciated only in its obliteration.
It is made to be eaten, “translated” into eater. It does a baker good to be rid of their loaves. The lack of accumulation is part of the flow: after mixing’s done, we discard the surplus starter. It is both valuable and superfluous. The ritual of bread-making, daily or weekly, is one of practice and alchemy, not of procuring actual gold. The transmutation occurs in both the ingredients and the practitioner, if you allow it.
Philosophy of Bread
Allow me to state it clearly and boldly: there are three things to do when making this style of bread, and each starts with “more.” MORE HYDRATION, MORE FERMENTATION, MORE HEAT IN THE OVEN! That’s it, in a nutshell: my philosophy of bread.
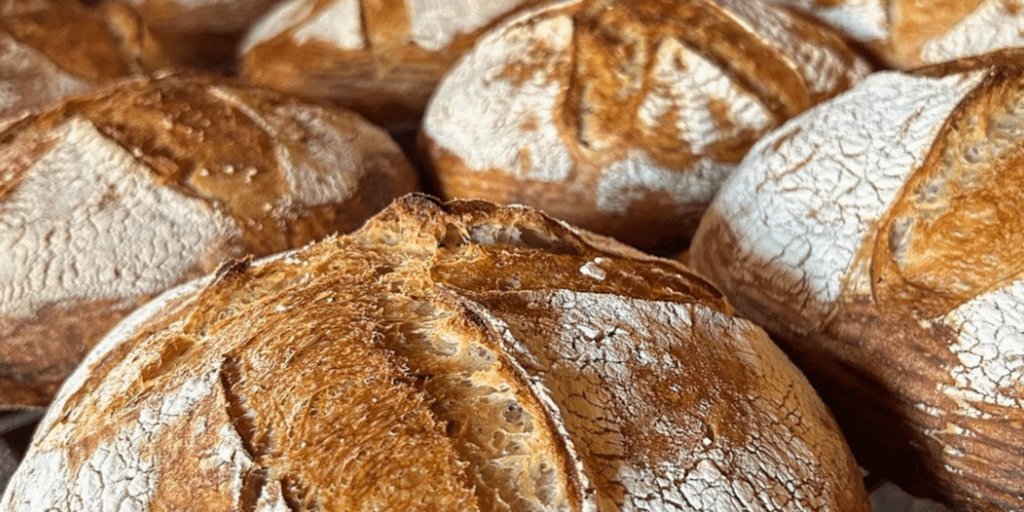
Rosemary Bread
Formula
Makes 2 (1 1/2-pound) loaves
- Water 75% 630 g
- Olive oil 7% 59 g
- Sourdough starter 12% 100 g
- White bread flour 100% 840 g
- Salt 3% 25 g
- Dried rosemary 14.4% 121 g
- 50-50 all-purpose flour and white rice flour mix, for dusting
This is easily the most romantic bread we make. We see it seduce customers with its perfume and fly off the shelves, oven-warm. The Romans carried rosemary to Britain, and Charlemagne had it planted at every monastery. This herb beguiled Pliny and Cervantes. And Simon and Garfunkel, too. So why not you?
It’s almost just a French round with herbs and some olive oil, but romance is always more than the sum of its parts. Something in rosemary’s fat-soluble camphors, phenols, and carnosols plays pinball with one’s lower sinuses, in a sexy kind of way. Not always so bad, being led by the nose . . .
Anyhow, that’s Rosemary Bread. Popular but proper, it gets along with most anyone, from cream cheese to strawberry jam to squash soup! Conjure her up, invite her in, and you will happily make room for this unselfconscious diva.
Instructions
Combine the water, olive oil, starter, and flour in a mixer fitted with the paddle attachment. Mix on first speed for 4 minutes, adding however much water seems necessary to keep it from binding together too tightly. Cover and let rest in a warm place for 20 minutes.
Replace the paddle attachment with the dough hook; oil the hook if necessary. Uncover the dough and mix on second speed for 4 minutes, adding the salt and a little water halfway through and then the rosemary for the last full minute. Add more water, if needed, to make it a floppy (but not sloppy) dough.
Transfer to an oiled bin and cover. Bulk proof in a warm spot until it doubles in volume, 4 to 6 hours, giving it envelope folds every hour or so. Divide the dough in half and shape each into a nice, tight round, dust well, then place in proofing baskets. Store, covered, in the fridge overnight.
The next day, assess the development of your loaves. If you want to see them bigger and softer, bring them out to warm up to room temperature. Preheat the oven to 475°F (246°C), with your steam setup and baking stone, parchment-lined baking sheet or Dutch oven inside. For pseudo-historic reasons, I cut a cross on the top of each loaf, so the grandkids refer to it as “X Bread.” It marks the spot! Place the loaves on your baking surface of choice (and cover with the lid if using a Dutch oven) and immediately turn the oven down to 425°F (218°C). Bake for 20 minutes, uncover the Dutch oven (if using), and continue baking for an additional 20 minutes, or until the loaves sound hollow when tapped on the bottom.
Rosemary Walnut Scones
Ingredients
Makes 8 large (51/2 oz) scones
- All-purpose flour, chilled 310 g
- Pastry flour, chilled 200 g
- Sugar 1/4 cup (50 g)
- Baking powder 1 tablespoon (12 g)
- Baking soda 1 teaspoon (6 g)
- Salt 1 teaspoon (6 g)
- Butter, chilled, then cubed or sliced 227 g (2 sticks)
- Dried rosemary 4 teaspoons (5 g)
- Walnuts 1 cup (117 g)
- Buttermilk 1 cup (242 g)
- Heavy cream 1 tablespoon (14 g)
- Maple-buttermilk glaze: 1 tablespoon buttermilk (14 g) whisked with 1/4 cup (78 g) maple syrup
On the wall of our bakery’s pastry department are these notes for scones and biscuits:
- Keep ALL the ingredients as cold as possible. (Don’t freeze butter though; it doesn’t break down as nicely).
- Do not overmix, and this includes the butter. There should be visible chunks of butter in the final dough. How long the mixing takes will vary according to butter cube size and weather. Adjust accordingly.
- Add liquid slowly, and stop mixing once the dough comes together. You may need to mix in a little by hand, or distribute wetter pieces with drier pieces. Do this by hand, not in the mixer.
- Handle the dough as little as possible. It’s okay to reroll, but do not wad the dough; stack pieces on top of one another.
- Work quickly so the dough isn’t sitting out too long. We want the chemical reaction to happen in the oven, not while the dough is sitting on the counter. Brush off excess flour.
- Bake until golden. Do not underbake; pale pastries are sad.
Instructions
Preheat the oven to 375°F (190.5°C).
Combine the flours, sugar, baking powder, baking soda, and salt in a large bowl and set aside in the freezer for at least 10 minutes (or up to 2 years). Transfer the dry ingredients to a mixer fitted with the paddle attachment, add the butter, and beat at medium-high speed (gear 5 or 6) until the butter begins to break down into smaller pieces. Now, add the rosemary and walnuts.
Combine the buttermilk and cream. Slowly add the buttermilk mixture at moderate speed until it begins to come together. Once combined, turn out onto a floured surface and make 2 to 4 folds by cutting the dough in half, then stacking one half on top of the other and pressing down. Roll out the stack to an 8-inch square. Trim the edges straight with a dough knife. Cut down the center and crosswise to create four 4-inch squares, then cut diagonally across each square to create eight triangles. Place the scones on a parchment-lined baking sheet.
Brush each scone with the maple-buttermilk glaze (whisked together for a loose, but not watery consistency) and bake for about 14 minutes, or until they look golden-brown delicious: crispy on the edges with a center that has give but is not mushy. Allow to cool for 2 minutes, then brush with the glaze again.
Rosemary’s Stuffing, Baby
Ingredients
Makes enough for a 15-pound (6.8 kg) turkey
- Rosemary Bread, cut into 1-inch cubes 2 loaves
- Large eggs 2
- Onion, chopped 1
- Celery stalk, chopped 1
- Small carrot, chopped 1
- Garlic clove, minced 1
- Salt 1/4 teaspoon
- Black pepper 1/4 teaspoon
- Butter 2 tablespoons (28 g)
- Extra-virgin olive oil 1 tablespoon (13 g)
- Vegetable broth 6 to 8 cups (11/2–13/4 L)
There are customers who come into the shop about a week before Thanksgiving with a gleeful (though slightly maniacal) look on their faces. As if they are dying to tell you a secret but don’t, they ask for two loaves of Rosemary Bread. The dirty secret is that those loaves headed for the cutting board are not just going to be sliced; they are going to be cubed for stuffing. Undoubtedly destined for a costarring role next to a real turkey.
Instructions
Preheat the oven to 200°F (93°C).
Spread out the bread cubes on parchment-lined baking sheets and bake for 30 minutes. The cubes should be thoroughly dried out. Set aside. Turn the oven up to 300°F (149°C).
In a large bowl, toss together the onion, celery, carrot, garlic, salt, and pepper. Spread the vegetables evenly in a large roasting pan.
Melt the butter with the olive oil over low heat. Pour over the vegetables and mix until evenly covered.
Bake for about 30 minutes, stirring halfway through. This slow roasting should yield lightly caramelized ingredients. Remove from the oven. Turn the oven up to 375°F (190.5°C).
Pour 6 cups vegetable broth into a large bowl. Add the cooked vegetables and dried-out bread and mix well with your hands. Make sure all the cubes have absorbed the broth. Add more broth if not. Allow the mixture to cool to room temperature. Beat the eggs together in a separate bowl, then add to the cooled mixture and blend it with your hands.
Transfer to a large oiled casserole dish, cover with foil, and bake for 30 minutes. Uncover and bake for an additional 10 minutes, until it is nicely browned on top.
Recommended Reads
Recent Articles
So you want to start reaping your harvest, but you’re not sure where to start? Learn how to break down the options of harvesting tools!
Read MoreWhat’s so great about oyster mushrooms? First, you can add them to the list of foods that can be grown indoors! They are tasty, easy to grow, multiply fast, and they love a variety of substrates, making oyster mushrooms the premium choice. The following is an excerpt from Fresh Food from Small Spaces by R. J.…
Read MoreWant to start your own medicinal herb garden? Passionflower, lemon balm, and goldenseal are great places to begin! These herbs are jam-packed with medicinal properties and easy to grow in a majority of climates.
Read More


