Make Rice Koji in 12 Easy Steps
Looking for a new cooking project? Try your hand at rice koji!
Follow these steps by two renowned chefs to make delicious rice koji at home.
The following is an excerpt from Koji Alchemy by Jeremy Umansky and Rich Shih. It has been adapted for the web.
Making Basic Rice Koji the Traditional Way
Let’s walk through the basic rice koji making steps—both the traditional methods and what’s worked for us.
1. Source the Proper Rice
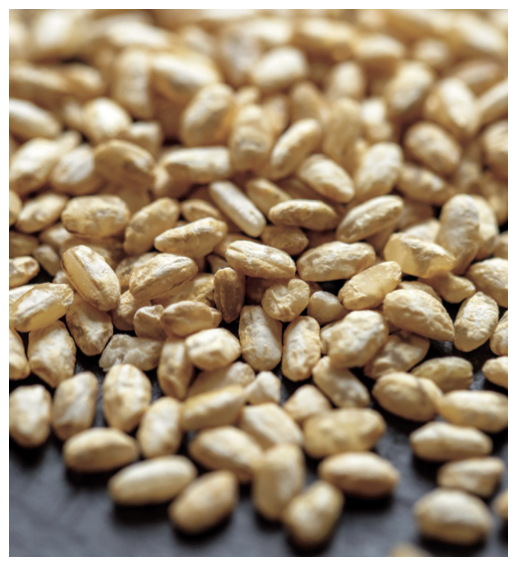
Koji prefers the starch amylose, which is found in higher concentrations in long-grain rice. There are three main grades of rice grains: short, medium, and long. Generally speaking long-grain varieties contain higher ratios of amylose to amylopectin, whereas short-grain varieties are the opposite and contain a higher ratio of amylopectin to amylose.
While brown rice does contain a higher density of micro- and macronutrients for koji, it is mainly reserved for savory applications such as amino pastes. Long-grain white rice is the best all-purpose substrate. We love the koji we obtain from jasmine rice.
This isn’t to say that you should only use jasmine rice; it’s just what we generally prefer. You may also have a preference for organic versus non-organic rice. Simply put, choose your rice based on what’s important to you and the results you want to achieve.
2. Wash the Rice
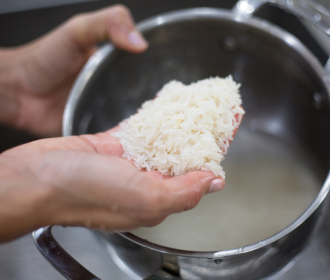
The residual starch can cause your rice to stick and clump when it is cooked, which is not conducive to growing a strong sake koji, for example, as it needs proper air exposure. For this reason, you must wash the rice under cold running water until the water is crystal clear and no longer clouded by free starches.
The washing process can take 30 minutes or more, depending on the variety of rice and how clean you want it to be. This is most important factor driving the base flavor of a sake. For most other applications, however, washing doesn’t need to be as diligent—it’s even okay to skip it altogether.
3. Soak the Rice
The rice must be soaked at ambient temperature for at least 6 hours. This is done to partially hydrate the rice so the appropriate gelatinization of the grains can be achieved during steaming. This is an important step that you must not skip.
4. Steam the Rice
Traditionally steaming was done in a bamboo steamer set over a pot of boiling water. First, line the steamer basket with a lint-free cloth to prevent the rice from falling through the wooden slats. Then drain the rice from its soaking liquid and put it in the basket. Fill other steamer baskets of the same size accordingly and stack them on top. Place the lid on the basket and let the rice steam for 45 to 75 minutes.
The goal is to cook the rice to the point you’d consider pasta to be done (al dente). The Japanese concept of gaikou-nainan encompasses this—that moment when the surface of the cooked rice is hard and the inside is soft. This forces the mold to focus on growing into the rice instead of just on the surface.
5. Cool the Rice
Spread out the rice evenly onto a large surface and sometimes fan it to allow it to cool. For those of us making smaller batches, hotel/baking pans work well. In general, any food-safe pan or tray that will fit into your incubator will get the job done. An evenly filled tray should have no more than a 11⁄2-inch-high (3.8 cm) bed of grain.
Koji will start to die off if it is exposed to temperatures above 115°F (46°C) and will be completely dead at around 130°F (54°C). It prefers a temperature range between 70°F (21°C) and 95°F (35°C). The cooling process helps to dispel excess moisture and allows the gelatinized starches in the rice to set in place. Koji makers can gauge whether the rice is cool enough just by touching it. Or you can use an accurate probe or IR gun thermometer.
6. Inoculate the Rice
Koji spores were traditionally applied using small handheld bamboo shakers similar to salt shakers. The koji maker would sprinkle the spores over the rice in such a way that an evenly dispersed cloud would rain down onto the rice.
On a small scale we’ve found that putting the amount you need on a small spoon and lightly tapping as you move over the rice bed works just fine. The ratio we use is 1 gram (0.04 ounce) of spores to 1 kilogram (2 pounds) of rice.
7. Mix the Rice and Spores
Gently mix the rice and spores by hand to ensure that the spores are evenly dispersed and cover as much rice as possible. You want to do this such that the rice grains are neither crushed and broken, nor smashed together to form large sticky clumps. Koji needs exposure to atmospheric oxygen; if the grains stick together, no koji will be able to grow. A thorough mix for a few minutes is enough to disperse the spores.
8. Mound the Koji and Cultivate the Rice
Traditionally, the inoculated rice is heaped into a large pile on a tarp, covered, and rested for a minimum of 6 hours. In your case, leaving the rice in a tray spread evenly for 12 hours works well. How the rice is specifically covered depends on the incubator you’re using. (Those details are described in step 10, “Tray the koji.”)
9. Mix the Rice
After the first rest, mix the rice. This does three things over the course of the growing process: It aerates the rice, cools it, and spurs vigorous mycelial growth. As koji grows, it generates heat. The heat can swing so intensively that it rises above 130°F (54°C), thus killing the koji before it has time to fully produce its mycelial mat.
Without this step the koji would fail to thrive and then spoil and decompose. As the koji is mixed, the mycelium is broken into smaller pieces that in turn grow with more voracity. This, in some respects, is similar to the reasoning behind pruning a fruit tree.
10. Tray the Koji
Place the inoculated mixed rice into square or rectangular trays made from Japanese cedar wood that have been lined with lint-free cloths. Instead of spreading it into a flat layer, form the rice into numerous ridges or mounds that rise and fall over the surface. These ridges can be linear and parallel, or you can arrange them in a circular pattern.
This step is an art, meditative in the same way as a thoughtful Zen garden. It’s also practical, however, in that these ridges and mounds increase the surface area of the rice and expose more of the grains to air. The trays are covered by lint-free cloths to help maintain high humidity, then stacked and allowed to rest. The cloths are called tenugui in Japanese and are made of a very finely woven cotton fabric. They do not easily fray or shed lint that can become stuck to the koji. You can easily find lint-free cotton cloths at many retailers.
11. Mix and Rest, Mix and Rest
The mixing and resting cycle is executed a number of times until the koji has fully bloomed and grown deeply into each grain of rice. You can break grains of rice to see how deep the hyphae of the mycelium have penetrated. (The closer to the center of the grain, the better.) We’ve found that mixing and mounding every 12 hours until you hit 48 is sufficient.
12. Give the Koji A Final Inspection
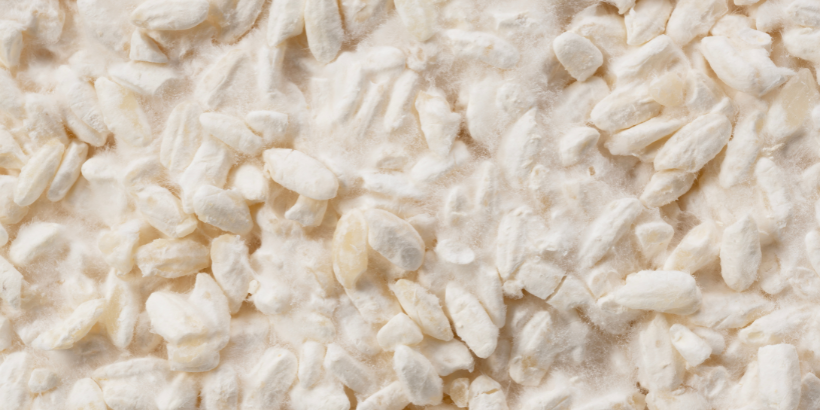
Carry out a final inspection of the koji rice. Aromatic and visual cues will let you know exactly when to harvest the koji and use it as needed. The koji will become extremely fragrant with an aroma that many people describe as a mix of fresh fungus, chestnuts, honeysuckle, champagne, and tropical fruit. The main visual cue is a stark white fluffy mycelial mat that has completely and tightly bound the grains of rice together.
Once these two cues are apparent to your standard, the koji is ready. From start to finish this entire process averages between 2 and 4 days.
Recommended Reads
Recent Articles
Indulge in the sweet aroma of these pastry-wrapped pears! Easy to make and stunning to serve, these pastry-wrapped pears are a game-changer.
Read MoreThe scent of fir trees is a holiday staple 🎄 Imagine sipping a festive cocktail infused with the unmistakable taste of fir ✨ This holiday season, elevate your entertaining game by introducing fir to your menu – from classy cocktails to rustic potatoes!
Read MoreDitch boring snacks and upgrade to adorable fruit & veggie treats you’ll love! Brighten up snack time this winter using fruits and veggies we all know and love. Can you resist taking a bite of these cuties?
Read More


