No-Till Arugula Start to Finish

Growing no-till arugula is a simple and environmentally-friendly way to grow your own food. These greens can be used on pizzas, salads, and as a garnish on almost any dish. By following the steps below, you’ll be all set to harvest arugula within the year.
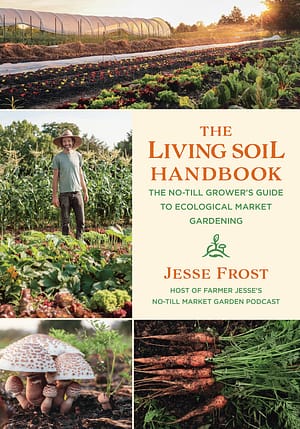
The following is an excerpt from The Living Soil Handbook by Jesse Frost. It has been adapted for the web.
Growing No-Till Arugula
Arugula is a popular salad green that we can sell year round to a wide audience. It is also a fast germinator that works well in a no-till system for the ease with which it can be terminated.
Arugula Varieties
We grow Astro year round. We’ve also had good success with Esmee in the spring.
Estimated Seed Quantities
When purchasing seed, we figure on 0.2 ounce (6 g) per 100-foot (30 m) row—six rows means 1.2 ounces (34 g) per 30-inch-wide (75 cm) bed. After I figure the total amount of seed we need, I usually buy an extra ounce (28 g) or two (57 g) just in case. If that reserve is still left at season’s end, I generally mix the seed into the fall cover crop seeds (it winter-kills easily in our region).
Bed Prep
Arugula seeds must have good soil contact and good moisture to germinate, but germination is quick compared to other crops—2 days when soil is 65 to 80°F (18 to 27°C). If sown in compost and the compost feels dry to the touch a few hours after a watering, it’s a sign that it is not retaining enough moisture for consistent germination.
In a deep compost mulch system, it is okay to compress the compost slightly to increase moisture retention—a weighted bed-roller is effective before or even after planting. If you do not work with a deep compost mulch system, keep in mind that arugula does not grow well in compacted native soils, and compaction should be addressed before sowing.
Weed Control
As a 20- to 30-day crop, arugula outruns most weeds, but if you wish to harvest a second cutting, you must tend to the weeds first, or they’ll contaminate the cut. Mulches help with weed control. A stale seedbedding prior to planting is effective, as well. Either way, make sure that you do not plant arugula into a weedy bed, and give the crop one cultivation before the canopy of arugula fills out. Also, remove any weeds by hand before harvest— it’s easier to do in the field than when you are washing and packing.
Pest Control
From fall to early spring, we do not have many issues with flea beetles, but in the summer we cover our arugula to reduce the incidence of the tiny holes characteristic of this pest.
Though most of our beds do not suffer from flea beetle pressure, generally speaking, we don’t risk leaving the crop exposed for fear of losing a planting. Light row cover can protect arugula from most pests.
Seeder

We seed all of our arugula with the Jang. Here, I am sowing our fall arugula in September, a crop that we cut multiple times through the fall and winter.
For baby arugula, we use the Jang JP-1 with the sprockets set at 9 in the back and 14 in the front. We use the YYJ-24 roller with the brush down. For years we employed the EarthWay with the cabbage-turnip plate to plant arugula with great success.
The four-row and six-row pinpoint seeders from Johnny’s Selected Seeds are very effective, but not for sowing through a thick mulch of compost. The mulch tends to bunch up in front of the seeder—the four-row is worse than the six.
We have transplanted arugula in the past, but because the density and number of plants needed, it can be very labor intensive to get a worthwhile stand unless selling “bunching arugula.” The Paper Pot Transplanter from Paperpot Co is another option that we’ve tried with some success, but arugula is such an easy crop to direct seed in the tunnels almost year round in our climate that we don’t find transplanting necessary.
Spacing
The goal is a thick stand of plants in the row, around a quarter to one-half inch (6 to 13 mm) apart. In the spring and summer we sow seven or eight rows per 30-inch (75 cm) bed. For the winter we sow only six rows per bed in the tunnel to allow for more airflow.
Harvest and Yield
Speed and cleanliness are key components of successful arugula harvesting. If you plan to grow loads of arugula, the Quick-cut Greens Harvester from Farmers Friend is a must. This is an expensive tool, but it’s a tool that cuts the job of harvesting down from half an hour to just a couple of minutes per 50-foot (15 m) bed.
Just on the time savings alone, a few beds of arugula cut with the Quick-cut will cover its high cost. Using the Quick-cut, we always harvest arugula early before the heat of the day sets in. If the arugula is starting to bolt, but there are still good leaves, we harvest with a knife, working to avoid the bolting arugula.
Washing Arugula
We wash arugula gently and spin it dry in a salad spinner (that was converted from a washing machine). Bags are packed to the weight that we need (for market that is 0.20 pounds [90 g]). Water always increases the risk of contamination, so when the leaves are clean at harvest we do not wash arugula afterward to avoid the risk of pathogens.

A drill attached to the Quick-cut Harvester powers the serrated blades that do the cutting as well as drives the spinning green brushes that gently push the material into the green canvas catchment “basket.” This cut and catchment system allow you to harvest several feet at a stretch before stopping to unload the basket.
From the first harvest we expect about one pound (450 g) per bed foot (30-inch [75 cm] beds). The second harvest yields three quarters of a pound (340 g) or less per bed, and the yield continues to decrease with subsequent harvests.
A tip I gleaned from Ben Hartman’s book The Lean Farm Guide to Growing Vegetables is to lightly rake the arugula bed after harvest to remove any fallen leaves that can rot on the fresh growth and taint the next harvest.
Intercrops
Although we do very little interplanting with arugula, we have found that it produces quite well in the tunnels below nightshades in the early plantings of April where row cover is not necessary yet. Arugula does work well in a relay crop, where sections in arugula beds are removed in the early spring to make space for long-season crops such as tomatoes.
Marketing
We pack arugula for market at 0.20 pounds (90 g) per bag. When we sell it in the marketing system, we use the one item for three dollars or two items for five dollars pricing. This works out to be between $12.50 and $15 per pound (450 g). If you want to avoid plastic bags, you can certainly do so.
Grower Stephen Ciancioso of Buena Vista Gardens in Hawaii has put a great deal of work and thought into reducing his plastic usage. Stephen has used biodegradable NatureFlex bags for several years and recommends them. The bags are available from many online purveyors.
Hardest Season: Summer
The challenge with summer arugula is twofold—the heat makes germination tougher and it also reduces the number of cuts because the plants tend to bolt earlier, thus affecting yield. Arugula may need to be misted several times a day on sunny days to cool it off. For those reasons, we prefer to grow our arugula in the tunnels all through the summer, because the plastic barrier provides a small amount of shade. In the field in the summer, we provide that shading by covering arugula with insect netting.
Notable Failures
Summer is also the time when our arugula experiences the most flea beetle pressure. We must cover the arugula to protect it from the beetles. We used to use row cover, but even when we used the lightest-weight covers we would often lose part or all of the crop to rot or simply overheating. Investing in fine-mesh ProtekNet, albeit expensive, has made a huge difference.
It protects the arugula without smothering it with trapped heat. Our hope is that in the future we’ll reach a point when we do not need to cover arugula in the summer. We see this as a realistic goal, because we’ve observed that as the soil improves flea beetle populations go down. However, growing arugula without cover is a goal to approach slowly and with caution, using tools like ProtekNet as needed.
Recommended Reads
Recent Articles
Oxeye daisies are one of the most important plants for pollinators including beetles, ants, and moths that use oxeye daisies as a source of pollen and nectar. Instead of thinking about removing a plant like oxeye daisy, consider how you can improve the fertility and diversity of habitat resources in your home landscape, garden, or…
Read MoreSo you want to start reaping your harvest, but you’re not sure where to start? Learn how to break down the options of harvesting tools!
Read MoreWhat’s so great about oyster mushrooms? First, you can add them to the list of foods that can be grown indoors! They are tasty, easy to grow, multiply fast, and they love a variety of substrates, making oyster mushrooms the premium choice. The following is an excerpt from Fresh Food from Small Spaces by R. J.…
Read MoreEver heard the phrase, “always follow your nose?” As it turns out, this is a good rule of thumb when it comes to chicken manure. Composting chicken manure in deep litter helps build better chicken health, reduce labor, and retain most of the nutrients for your garden. The following is an excerpt from The Small-Scale Poultry…
Read More
