How To Make Blue Cheese
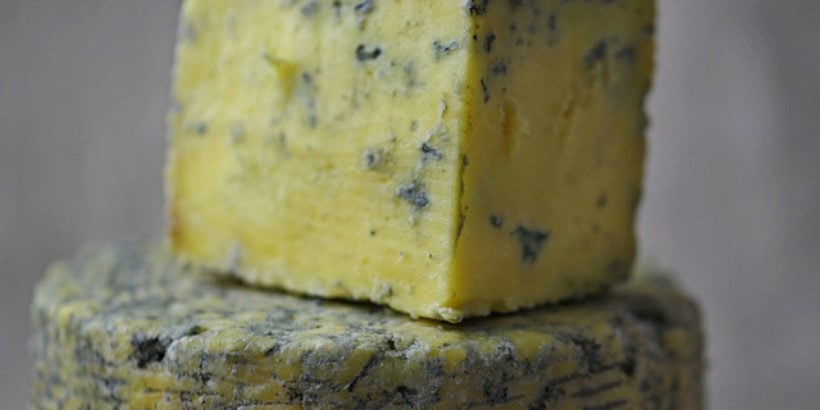
Attention, moldy cheese lovers — this recipe is for you! “Moldy” isn’t usually a quality we look for in our food; but when it comes to blue cheese, the mold cultures contribute largely to its unique texture and bold flavor.
The following is an excerpt from Mastering Artisan Cheesemaking by Gianaclis Caldwell. It has been adapted for the web.
(All photographs courtesy of Gianaclis Caldwell unless otherwise noted.)
RECIPE: Rindless Blue Cheese
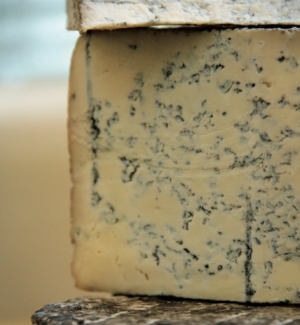
Roquefort is arguably the most famous blue cheese in the world and I would say easily the most well-known sheep’s milk cheese.
I can still remember my parents teaching my sister and me that the “Roquefort” salad dressing served to us on our iceberg lettuce salads at the local restaurant should actually be called “blue cheese” dressing, because Roquefort was a specific type of French blue cheese, which our salad dressing was definitely not.
Pretty hip for country folks, weren’t we? Roquefort, which has been an AOC cheese since 1925, is made exclusively from the raw milk of Lacaune sheep.
Danablu (also called Danish Blue) was purposefully modeled after Roquefort but is milder and made from cow’s milk, as is another French cheese called Bleu des Causses. Beenleigh Blue is an English rindless blue made from raw, organic sheep’s milk that Max McCalman notes as similar and worth tasting. (My list of “must tries” continues to grow!)
Ingredients
- Milk: 4 gal (15 L/34 lb) high-fat milk (about 6% butterfat is ideal)
- Culture: 1⁄4 tsp (0.6 g) MM 100 (or equivalent blend) and 3 to 4 skewer tips P. roqueforti rehydrated in 1⁄4 cup (60 ml) room-temperature milk
- Lipase (optional): 1⁄8 tsp (0.7 g) lamb lipase (or other lipase). Lipase will help duplicate original Roquefort, which is made with rennet paste (contains lipase).
- Calcium chloride (optional): maximum 1 tsp (5 ml) calcium chloride diluted in 1⁄4 cup (60 ml) cool, non- chlorinated water
- Rennet: 3⁄8 tsp (1.6 ml) single-strength rennet diluted just before use in 1⁄4 cup (60 ml) cool, nonchlorinated water
- Salt: 3 tbsp (45 g) pure salt
Steps
Prepare Equipment: Make sure all equipment is cleaned and sanitized and that your cheesemaking space is free from possible contaminants. Refer to chapter 6 for tips on proper equipment preparation.
Prepare Milk: Warm milk to 89 to 90°F (32°C).
Culture: Sprinkle cultures on top of milk. Let set for 2 to 5 minutes, then stir gently for 3 to 5 minutes.
Ripen: Maintain temperature at 89 to 90°F (32°C), and hold it there for 30 to 35 minutes.
Additions: Stir in lipase solution, then stir in calcium chloride solution. Wait 5 minutes.
Coagulate: Stir in rennet solution with an up-and- down motion for 1 minute. Still the milk. Hold temperature at 89 to 90°F (32°C) until clean break is achieved. The goal coagulation time is 2 hours.
Cut: Cut curd mass into 3⁄8- to 1-inch (1–3-cm) cubes. Rest for 5 minutes.
Stir: Stir curd gently two to five times over the next 40 to 60 minutes. Maintain at 89 to 90°F (32°C). Let curds settle.
Tips: During stirring the goal is to keep the curds from matting and allow them to develop acid and shrink a bit. By the end of the stirring phase, curds will be soft and high in moisture content, but they should be even in texture.
Drain: Drain whey to level of curds. Place curds in a cloth-lined colander, and sprinkle with 1 teaspoon (5 ml) salt. Mix gently. Ladle or sprinkle curd into tall, cloth-lined forms. Set follower gently on top of curd with no pressure or weight applied. Drain at room temperature of 68 to 73°F (20–23°C) for 2 to 3 days until curd pH is at 4.8. Turn daily.
Tips: If you are using a vat from which the whey can be fully drained, the curds can be drained and salted in the vat, then placed in forms. Forms should have at least an equal diameter-to-height ratio but can be a bit taller than the diameter.
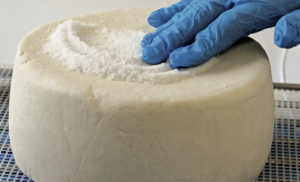
Salt: Unmold onto a draining rack. Rub each side of wheel with salt daily for 2 days. Room temperature should start at about 72°F (22°C) and decrease to 68°F (20°C) by the end of this period.
Affinage: Move to aging room at 50 to 55°F (10–13°C) and 90 percent RH. Turn daily. After 8 to 10 days, pierce vertically using a sanitized 3.5 millimeter knit- ting needle or similar-size meat skewer. Pierce three to four holes per square inch (6.5 sq cm). Pierce again after 2 more weeks of aging. Continue to age at 50 to 55°F and 90 percent RH. When adequate blue growth has occurred (check by doing a core sample), the cheese can be wrapped in foil or waxed and moved to a colder environment at about 37°F (3°C) and aged for several months.
Large Batch Guidelines
- Milk: 12 gal (46 L/100 lb) milk
- Culture: 2–4U MM 100 (or equivalent blend) and 1⁄4 dose P. roqueforti
- Calcium chloride (optional): 10–15 ml (about 1 tbsp)
- Lipase (optional): 1⁄4–1⁄2 tsp (1.4–2.8 g)
- Rennet: 5–6 ml single-strength rennet (2.5–3 ml double strength)
- Salt: Goal is 2.5–3% of weight of drained cheese
Recommended Reads
Recent Articles
Want to grow year-round, but a greenhouse feels like a big investment? When it comes to cost and flexibility, low tunnels are the all-around winners.
Read MoreWintergreen is the stunning evergreen groundcover that’s a game-changer for your garden! It’s cherished for its aromatic leaves, vibrant fall color & bright berries.
Read MoreGrow winter carrots for a sweeter & more flavorful harvest! Ditch the bland, store-bought carrots this winter! Grow your own winter carrots for a sweeter and more flavorful twist 🥕🥕
Read More

