Two-Step Bed Flipping: Increasing Your Production on a Small Footprint

Flipping your plant beds is as simple as 1, 2! Follow these tips for two-step bed flipping to successfully increase your crop production no matter the season.
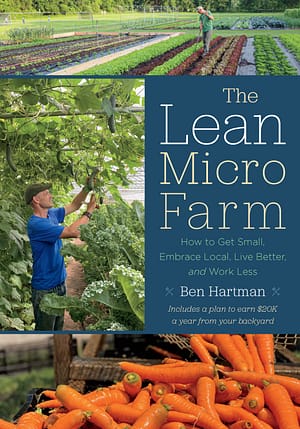
The following is an excerpt from The Lean Micro Farm by Ben Hartman. It has been adapted for the web.
Unless otherwise noted, all photographs and illustrations copyright © 2023 by Clay Bottom Farm.
A Guide to Two-Step Bed Flipping
When preparing garden beds, there are only two things you really need to do—clear away old crops (or weeds) and smooth the ground. Everything else is probably superfluous, or trivial, to use Pareto’s term. In this chapter, I explain a simple way to essentialize bed preparation.
On tiny farms, market gardeners might flip—or transition—beds from one crop to another several times per season to make the most of every square foot. With these rotations, you effectively double or triple your production area by planting the same beds two or three times each year.
That is, a 1⁄3-acre plot literally becomes equal to a 2⁄3- or 1-acre farm growing one crop per year. This justifies applying a large amount of compost to keep fertility levels high for multicropped beds.
The Key to Successful Bed Flipping
The key is to flip the beds quickly and efficiently. At Clay Bottom Farm, we flip more than 100 beds each season—easily our most burdensome task, an opportune place to lean up.
Here is the bed-flipping process we devised when we moved to our new farm. First, we cover old crops (usually without cutting) with a silage tarp and let the greens decay in the sun (step 1); within a few weeks, the crops will turn to mush.
Next, we remove the tarp and rake any debris into the path, if needed (step 2). The bed is then ready to replant—no broadforking, chisel plowing, rotovating, hoeing, undercutting, or fertilizing required. The method is as uncomplicated as it gets.
Two-Step Bed Flipping: Perfecting the Method

This method extracts the farmer from the growing process—you do just enough, as it were, and then walk away while nature does the rest. We save hours every season with this approach compared to conventional methods like tilling, chisel plowing, broadforking, ripping, or pulling out old crops by hand, while sparing our bodies unnecessary hard work.
After sixteen years of growing, I’ve concluded that most methods promoted for bed preparation, like those just mentioned, can be skipped, especially if you are deep mulching. They don’t pass the Pareto test.
As with deep mulching, this method would be impractical in a large operation with acres in production—it would be too cumbersome to manage the tarps. Below I describe two-step bed flipping in detail.
Just Smother It: A Better Way to Flip Short Crops
For spinach, baby greens, head lettuce, and other “short” crops, we pull a 14′ × 75′ silage tarp over top of the beds when we are done harvesting them. This size of tarp covers two beds at a time plus the paths on either side. If we need to cover just one bed, we’ll fold the tarp in half.
I recommend cutting tarps to narrow widths like this to make it easier for one person to handle them. Remember Schumacher’s advice: Design with humans in mind. Make your farming comfortable to do.
Cutting and Pinning Tarps
Cut tarps about 18″ wider than the bed/path width you plan to cover, as the crops underneath will push the tarp up slightly. Silage tarps for market gardening are available many places online. We buy ours at a local farm supply in order to save shipping costs, which can be substantial due to the weight of the tarps.
Next, we pin down the tarps with sandbags, which we fill with driveway gravel for optimum drainage. One sandbag spaced every two paces—about 6’—keeps the tarps pinned down in the wind. If you are in an extra-windy area, choose a closer spacing. If we are using more than one tarp side by side, we make sure to overlap the edges by at least 12″.
Laying the Tarp & Covering Crops

Tip #2: Stretch the tarps a bit as you lay them so that they are as tight to the ground as possible. The tarps kill the crops through light deprivation— occultation—and by trapping heat. The tighter your tarps, the darker and hotter it is underneath them.
Tip #3: If you’ve laid down drip tapes to irrigate, leave them in place under the tarps. They are easy to remove, if needed, after the crop has died.
Tip #4: Farm like a tree and work ahead. Tarp beds at least two weeks ahead of when you need to plant. Don’t wait until the last minute. On our farm, at least two beds are usually covered by tarps at all times in preparation for planting.
Covering Preparation
There’s no reason to mow, cut, or shred crops before covering them, unless you want to trim them down so that the tarp lays flatter. For example, we will sometimes trim cilantro and basil plants if they are knee-high or taller. We leave these trimmings on the bed surface, under the tarp, to decompose in place.
In most cases, however, it’s better to save your time. Worms and microbes will sufficiently shred and chew up uncut greens.
Two-Step Bed Flipping: Finishing the Process

Composting Decomposed Matter
Occasionally, this mess of decomposed matter is too bulky to fit neatly in a path. In this case, we rake it into a pile at the end of a bed, creating a small compost heap that we will spread across the bed in a month or two, once the greens have more fully broken down.
Alternatively, we might rake these spent greens underneath another nearby tarp—out of sight, out of mind—or add them to a compost pile near the plot. The point is to keep old plants as close to where they grew as possible, to let them enrich the soil and save yourself a backache.
The Takeaway: Let the Crops Lead the Way
There are rare occasions when we tarp a crop even before it has finished maturing. For example, in 2021, a bed of lettuce was overtaken by fast-growing Peruvian daisies that we had mistakenly let go to seed in 2020. We decided that instead of fighting the weeds, we would cover the bed with a tarp, let the daisies and lettuce melt, and start over in a few weeks with another crop.
Recommended Reads
Recent Articles
Oxeye daisies are one of the most important plants for pollinators including beetles, ants, and moths that use oxeye daisies as a source of pollen and nectar. Instead of thinking about removing a plant like oxeye daisy, consider how you can improve the fertility and diversity of habitat resources in your home landscape, garden, or…
Read MoreSo you want to start reaping your harvest, but you’re not sure where to start? Learn how to break down the options of harvesting tools!
Read MoreWhat’s so great about oyster mushrooms? First, you can add them to the list of foods that can be grown indoors! They are tasty, easy to grow, multiply fast, and they love a variety of substrates, making oyster mushrooms the premium choice. The following is an excerpt from Fresh Food from Small Spaces by R. J.…
Read MoreEver heard the phrase, “always follow your nose?” As it turns out, this is a good rule of thumb when it comes to chicken manure. Composting chicken manure in deep litter helps build better chicken health, reduce labor, and retain most of the nutrients for your garden. The following is an excerpt from The Small-Scale Poultry…
Read More
