How to Create A Rodent-Free Planting Bed

Are rodents like mice and squirrels ruining the vegetables and crops you’ve worked hard to cultivate? Fear not!
Expert gardener Dani Baker has offered a few tips to help you keep a rodent-free planting bed this growing season.
The following is an excerpt from The Home-Scale Forest Garden by Dani Baker. It has been adapted for the web.
Creating A Rodent-Proof Planting Bed

Figure 11.16. Saffron corms planted in a reinforced cage.
Here are instructions for making a rodent-proof planting bed like the one I made for my saffron crocus crop. This size bed will accommodate 300 corms. You can adjust the length and width of the bed to accommodate the number and spacing of the bulbs you intend to plant, as well as the space you have available. I constructed mine on the soil surface because of drainage issues at the site I chose. An alternative, as long as your soil is well drained and does not have a high water table, would be to dig out an area equal in dimensions to the hardware cloth “cage” and set the cage into the excavated area. In that case, the cage does not need to be reinforced with an outer wood frame.
Materials
- Two 14-foot (4.25 m) lengths of 5-foot-wide (1.5 m) hardware cloth (1⁄2-inch [13 mm] mesh)
- Two 13-foot (4 m) 2 × 6 wooden planks, or one for no wood frame
- Two 2 × 6 wooden planks, each 4 feet, 4 inches (132 cm) long, or one for no wood frame
- Stapling gun and staples
- Two 13-foot 1 × 3 wooden furring strips Two wooden furring strips, each 4 feet, 4 inches long
- 3-inch (8 mm) and 11⁄2-inch (4 mm) galvanized deck screws
- Wire-cutting tool
Process
Step 1. Cut the corners. Using a wire-cutting tool, make a 6-inch (15 cm) cut at each of the four corners of one of the lengths of hardware cloth. To the extent possible, cut through the tines as close as possible to a crossing wire, which leaves flexible ends that can later be folded over to secure the corners of the cage.
Step 2. Fold the mesh along one long edge. Place a 13-foot-long plank on edge on top of the hardware cloth, parallel to one of the long sides and 6 inches from the edge. Use a hammer to bend that side of the hardware cloth around the plank so that a 6-inch portion of the hardware cloth juts straight up.
Step 3. Fold along the other edges. Repeat this for the other three sides of the hardware cloth. This creates a “bed” of hardware cloth that is 4 feet (1.25 m) wide and 13 feet (4 m) long with 6-inch-tall sides.
Step 4. Wrap the “flaps” of hardware cloth at each of the four corners around the adjacent upright edge. Secure them in place by folding the tines at the end of each flap through and around the adjacent upright edge of hardware cloth.

Figure 11.15. Constructing a hardware cloth cage, steps 1 through 4. Illustration courtesy of Turner Andrasz.
Step 5. To install the cage, clear and level a site of the proper dimensions. Place the cage on (or in) the ground.
Step 6. To reinforce the cage if above ground, construct a wood frame around it by lining up the 13-foot planks and 4-foot 4-inch planks. Using the 3-inch screws, screw the planks together to secure them in place.
Step 7. Staple the wire cage to the inside of the wood frame.
Step 8. Sprinkle a thin layer of compost over the bottom of the wire cage and nestle crocus corms (or whatever you are plant- ing) into it at the proper spacing.
Step 9. Cover the corms, bulbs, or crowns with more compost and top that with soil, from excavating the site if available.
Step 10. Top off the bed with a layer of semi-composted wood chips.
Step 11. Lay the second piece of hardware cloth over the bed. To secure it in place and thus rodent-proof the bed, use the 11⁄2-inch screws to attach the 1 × 3 furring strips (placed over the hardware cloth) to the tops of the border planks on all four sides. If your cage is embedded in the ground, you can use heavy rocks to weigh down the hardware cloth cover so that rodents can’t slip underneath it.
Recommended Reads
Read The Book

The Home-Scale Forest Garden
How to Plan, Plant, and Tend a Resilient Edible Landscape
$34.95
You may like...
-
 $29.95
 -
 $24.95
 -
$45.00


Recent Articles
Have you heard of silvopasture? This system of managing grazing animals is an ancient practice that integrates trees and pasture into a single system for raising livestock. These systems are managed for both forest products and forage, providing short-and long-term income sources in a mutually beneficial way for healthier animals, better soil, less pest control and mowing, and…
Read More
Nothing says “spring” like a fresh, foraged meal! Savor the flavors of the season with this Milkweed Bud Pizza recipe.
Read More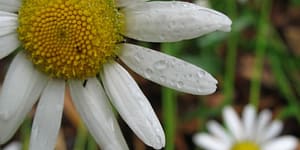
Oxeye daisies are one of the most important plants for pollinators including beetles, ants, and moths that use oxeye daisies as a source of pollen and nectar. Instead of thinking about removing a plant like oxeye daisy, consider how you can improve the fertility and diversity of habitat resources in your home landscape, garden, or…
Read More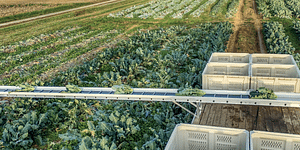
So you want to start reaping your harvest, but you’re not sure where to start? Learn how to break down the options of harvesting tools!
Read More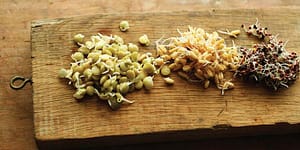
One simple and healthy way to breathe life back into your diet is by sprouting your own seeds. You can make nutrient-rich sprouts from all kinds of edible seeds right in your own kitchen. Sprouts are incredibly versatile too! You can make chickpea sprout hummus, salads, or in this case: energy bars! The following is…
Read More