How to Start Seedlings in a Cold Frame: Gardening Tips from Eliot Coleman

Are you ready to get a jump-start on the gardening season? With a cold frame, you can get started now. A cold frame harnesses the sun’s heat before it’s warm enough to let unprotected seedlings growing outside.
Essentially, it consists of a garden bed surrounded by an angled frame and covered with a pane of glass. All but the most heat-loving vegetables (like tomatoes and peppers) can be started in a cold frame. The biggest advantage of growing with a cold frame is that your plants can get in the soil right away, without enduring the unnecessary stress of having their roots constricted in trays.
The following excerpt is from Four-Season Harvest by Eliot Coleman. It has been adapted for the web.
(All illustrations by Kathy Bray. Cover photo courtesy of Barbra Damrosch.)
Your cold frame can serve as a greenhouse for starting seedlings.
You can use it for all seedlings that are transplanted except the early-spring sowings of heat-lovers such as tomatoes, peppers, and cucumbers. They should be started in a sunny window in the house. For all the others, the cold frame is an ideal place to start growing. Once you begin raising seedlings in the cold frame, you will find it so simple and successful that you will never go back to flats on windowsills. Here’s how to do it:
Spread potting mix about two to three inches deep in whatever part of a frame you wish to use for seedlings. Lay 3-inch boards around the edge as a border, then treat that area as if it were a flat: make furrows, drop in evenly spaced seeds, cover them shallowly, mark them with name and date on a small stake, and water them lightly with a fine sprinkler. The rows can be as close together as they would be in a flat. Space seeds evenly in the seeding row so they won’t be crowded. We always try to avoid plant stress at all stages of growing. It takes a little more time, but the results are worth it.
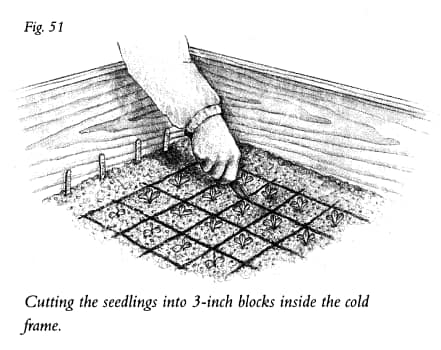
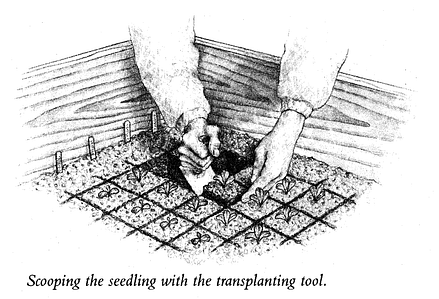
Poke holes in the potting soil of the adjoining section with the dowel to make space for the roots, then tuck them in lightly. A good distance for all seedlings is 3 inches apart. When they are large enough to transplant to the garden, use a knife to cut the soil into cubes with a seedling in the center of each. It is just like cutting a tray of brownies. If you make sure the soil is moist (sprinkle if necessary before cutting), the blocks will hold together nicely. You can use a bricklayer’s or right-angle trowel to slice underneath each cube, lift it out, and set it in a tray for transport to its permanent garden home.
There are many advantages to growing seedlings in a cold frame
Finally, watering is more forgiving, since your seedlings are connected to the earth and they can’t dry out as quickly as they can in the limited confines of a flat. Thus, an occasional lapse in watering is not disastrous.
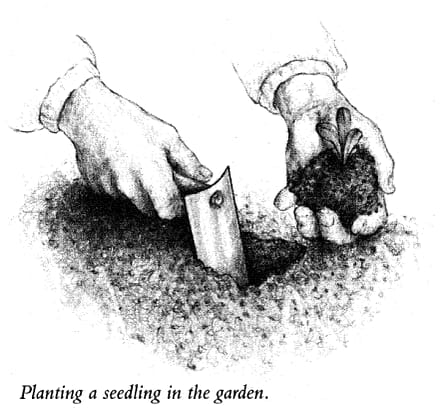
The intermediate transplanting from the seedling row to the 3-by-3-inch spacing makes transplanting seedlings a two-step process. We think it’s worth the effort because the intermediate step has been found to stimulate increased root regrowth, resulting in slightly more vigorous transplants. You can do it as a one-step process by simply starting out with the 3-by-3-inch configuration and planting three seeds in each square. After they emerge, you thin to the best one in each square and proceed as before.
If you were growing single plants in rows they would be set 3 inches apart. Four plants in a clump every 12 inches in a row is the same average spacing as one plant every 3 inches. Each onion is allowed just as much total garden space,and the yield is the same. The onions growing. together push each other aside gently and at harvest time are lying in a series of small circles rather than single rows. If all the seeds germinate and there are five onions in each clump, that’s no problem.
In addition to onions, you can use the multiplant technique for early transplants of beets, broccoli, cabbage, leeks, scallions, and spinach. Not only is this system more efficient because four plants can be transplanted as quickly as one, but it also can be used to control size when desired. A clump of broccoli, for example, will yield three or four smaller central heads rather than one large one. For many families, the smaller unit size is more desirable.
Recommended Reads
Build Your Own Cold Frame: Get a Jump on the Planting Season
Recent Articles
Nothing says “spring” like a fresh, foraged meal! Savor the flavors of the season with this Milkweed Bud Pizza recipe.
Read MoreOxeye daisies are one of the most important plants for pollinators including beetles, ants, and moths that use oxeye daisies as a source of pollen and nectar. Instead of thinking about removing a plant like oxeye daisy, consider how you can improve the fertility and diversity of habitat resources in your home landscape, garden, or…
Read MoreSo you want to start reaping your harvest, but you’re not sure where to start? Learn how to break down the options of harvesting tools!
Read MoreWhat’s so great about oyster mushrooms? First, you can add them to the list of foods that can be grown indoors! They are tasty, easy to grow, multiply fast, and they love a variety of substrates, making oyster mushrooms the premium choice. The following is an excerpt from Fresh Food from Small Spaces by R. J.…
Read More

