Quick Start Guide to Year-Round Greens

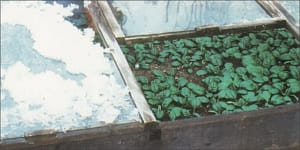
Cold temps and snow don’t have to mean the end of fresh greens! Follow this quick start guide to year-round greens for fresh salad greens in just a couple of weeks.
The following is an excerpt from Year-Round Indoor Salad Gardening by Peter Burke. It has been adapted for the web.
I teach gardening, and there comes a point in each class when I see smiles and nodding heads and I get the question, “Why haven’t I heard about this before?”
When people get it—the idea and how simple it is—they realize they can do this: They can grow a garden indoors. Indoor salad gardening is honest-to-goodness easy. Those moments when I see the light come on for people have special meaning for me. I remember when I first realized the same thing.
Get Ready Guide
To Plant Five Trays You Will Need:
 |
 |
 |
 |
| Five 3-inch by 6-inch (7.6 x 15.2 cm) trays (aluminum foil, half-loaf bread pans) or similar, such as five 6-inch (15.2 cm) ceramic cereal bowls
|
1 gallon (3.8 L) soil mix (standard germination mix), usually peat moss, vermiculite, perlite, and lime
|
5 tablespoons (74 ml) compost, one per tray (commercial or homemade compost)
|
3 teaspoons (14.8 ml) liquid sea kelp mixed with water, or 3 teaspoons (14.8 ml) dry kelp meal (use ⁄12 teaspoon per tray)
|
 |
 |
 |
|
| 1 tablespoon (14.8 ml) each sunflower, pea, radish, and buckwheat seeds
|
1 teaspoon (4.9 ml) broccoli seeds (you can substitute Chinese cabbage, kohlrabi, or any Brassica)
|
A stack of newspapers—one full sheet per tray (you can substitute paper towels, newsprint packing paper, or paper napkins)
|
Quick Start Guide
 |
 |
 |
 |
| Soak the seeds in small cups covered with plenty of water.
|
Add 4 cups (947.2 ml) water to the soil mix and set aside.
|
Wait a minimum of 6 hours for the seeds to soak.
|
Fold newspaper to serve as covers, each just a little larger than the tray.
|
 |
 |
 |
 |
| When seeds are ready to plant soak folded newspaper covers in water.
|
In the bottom of each tray mix ½ teaspoon (2.5 ml) of kelp and 1 tablespoon (14.8 ml) of compost.
|
Fill the trays with about 1¼ cup (296 ml) 7 moistened soil mix.
|
Level the soil, leaving about ¼ inch (0.6 cm) to top of tray for seeds and paper cover.
|
 |
 |
 |
 |
| Drain water from seeds with small strainer.
|
Spread moistened seeds over soil so they touch but do not overlap each other.
|
Press soaked newspaper cover into tray so it is in contact with the seeds.
|
Place planted tray in a warm, dark place for 4 days.
|
 |
 |
 |
 |
| On day 5 remove cover, water tray, and place on a well-lit windowsill.
|
Once a day water with about 2–4 tablespoons (29.6–59.2 ml) per tray.
|
After 3–4 days of growth and greening in the light, harvest shoots with scissors.
|
Wash harvested greens, and remove any remaining hulls.
|
 |
 |
||
| Chop greens into ¼-inch to ½-inch (0.6–1.3 cm) pieces and toss in a salad.
|
Add dressing and enjoy
|
Recommended Reads
Recent Articles
Nothing says “spring” like a fresh, foraged meal! Savor the flavors of the season with this Milkweed Bud Pizza recipe.
Read MoreSo you want to start reaping your harvest, but you’re not sure where to start? Learn how to break down the options of harvesting tools!
Read MoreWant to start your own medicinal herb garden? Passionflower, lemon balm, and goldenseal are great places to begin! These herbs are jam-packed with medicinal properties and easy to grow in a majority of climates.
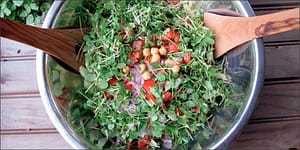
Read MoreDoes the cold weather have you dreaming about fresh greens and colorful salad? Grow and harvest sprouts indoors to make those dreams a reality! Follow this quick start guide to year-round greens for fresh salad greens in just a couple of weeks! The following is an excerpt from Year-Round Indoor Salad Gardening by Peter Burke. It…
Read MoreAre you ready to get a jump-start on the gardening season? With a cold frame, you can get started now. A cold frame harnesses the sun’s heat before it’s warm enough to let unprotected seedlings growing outside. Essentially, it consists of a garden bed surrounded by an angled frame and covered with a pane of…
Read More


