Hungry? Try These Holiday Appetizers (With a Twist!)

Adding an appetizer course is a great way to jazz up any holiday dinner. Next time you’re looking to celebrate, try out one (or both) of these delicious holiday appetizers; they’re perfect for the winter season and sure to be a hit with everyone at the table.
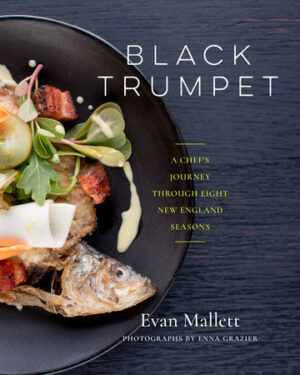
The following is an excerpt from Black Trumpet by Evan Mallett. It has been adapted for the web.
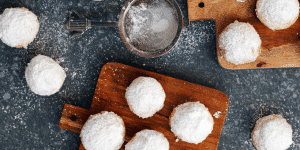
CB and FJ Finger Sandwiches
MAKES 12 LITTLE SANDWICHES
One of our first menus featured this cute little dish—a spin on PB&J, but using the soul-warming, seasonal flavors of chestnuts and figs. I highly recommend serving these sandwiches with a small snifter of warm brandied rosemary milk.
Ingredients
For the Chestnut Butter
|
For the Fig Jam
|
Preparation
PREPARE THE CHESTNUTS
Preheat the oven to 400°F (200°C). Stab each chestnut with a fork to create an outlet for air so they don’t explode all over your oven. Place the chestnuts on a baking sheet and roast on the top rack of the oven for 20 minutes. Remove from the oven and let cool to room temperature. Peel, removing all of the hard outer shell. The flesh should be tan-colored. If it’s black or mottled with discoloration, discard.
MAKE THE CHESTNUT BUTTER
Combine the roasted and peeled chestnuts in the bowl of a food processor with the salt, honey, and rose water. With the motor running, add the olive oil in a slow trickle, stopping often to scrape down the bottom and sides of the bowl so the other ingredients incorporate evenly with the chestnuts.
MAKE THE FIG JAM
Put all ingredients in a medium saucepan. Stir and cover the pot, simmering over a low flame until the ingredients are soft and mushy, about 15 minutes. Remove the lid and continue to cook over a low flame for an additional 10 minutes.
Remove the cinnamon stick and puree the jam in a food processor, scraping down the sides several times and spinning until the jam is one smooth consistency.
BUILD THE SANDWICHES
I think it’s safe to say everyone has built a peanut butter and jelly sandwich at some point, so assembling this should be a piece of cake. Rustic white or wheat bread makes the best bookends for the CB and FJ. Remove the crusts and cut rectangles from each slice if so desired.
Pretzel- and Chestnut-Crusted Meat Tarts
MAKES 10 TO 12 TARTS
I married into a family with roots in Montreal, an old-world city in the midst of the New World. For my in-laws, tourtiere is a family tradition, prepared on Christmas Eve, and it inspired this meat tart. One notable addition is the ricotta cheese, which makes the meat filling less dense and a little easier on the wallet when sourcing local meat, which can be quite expensive.
This recipe requires an 11-cup (2.6 L) food processor. If yours is smaller, be sure to divide both recipes into two parts and spin the ingredients in two batches.
Ingredients
For the chestnut-pretzel crust
|
For the meat filling
|
For garnish
|
Preparation
MAKE THE CHESTNUT-PRETZEL CRUST
Pulse the frozen chestnuts in a food processor until just smaller than pea-sized. Add the pretzel crumbs and spin just enough to incorporate. Add the bread crumbs, cornstarch, and salt, and spin just until combined. Add the butter and marrow (or just butter if marrow can’t be found) and cut into the crumbs by pulsing several times in the food processor. Remove to a bowl and refrigerate until firm, about 30 minutes to 1 hour.
MAKE THE MEAT FILLING
In a food processor, spin the livers until smooth. Add the ground meats and blend until just combined. Add the ricotta and pulse to combine. With the motor running, add the eggs and salt and whiz just until combined. Remove to a large mixing bowl and finish mixing with a spatula, to ensure there are no remaining chunks or streaks of ricotta or egg. Cover and refrigerate the filling.
MAKE THE GARNISH
Sauté the pearl onions in a hot pan with olive oil and salt for 4 minutes, then roast them in a 450°F (230°C) oven for 10 minutes.
MAKE THE MEAT TARTS
Spray twelve 4-inch (10 cm) cast-iron skillets, deep ramekins, or similarly sized bowls with pan spray. Place about ⅓ cup (70 g) crust into each vessel, pressing it firmly into the bottom and evenly up the sides. Place the pans on a baking sheet and refrigerate until the crust is firm, about 30 minutes.
Preheat the oven to 375°F (190°C).
Remove the baking sheet from the refrigerator and fill each shell with 5 ounces (142 g) of meat filling, spreading the meat to the edges with a rubber spatula or spoon. Bake 16 minutes, rotating the pan a half-turn after 8 minutes, until the filling is set and the crust is golden brown and bubbling.
Let the tarts cool to room temperature, and then store in a refrigerator for at least an hour. When you’re ready to serve, put the molds in a hot oven for 3 minutes, then invert the tarts twice to unmold them—once to free them from the molds and the second time to flip them over onto a baking pan. Arrange the roasted pearl onions on the top of the unmolded tarts and put them in a 400°F (200°C) oven for 5 minutes. The buttery crust will crumble somewhat, but don’t be alarmed. The texture of the crust is meant to be crumbly, and there will be an inevitable loss of crumb in the process of reheating the tarts. Transfer to plates and serve immediately.
Recommended Reads
Recent Articles
The scent of fir trees is a holiday staple 🎄 Imagine sipping a festive cocktail infused with the unmistakable taste of fir ✨ This holiday season, elevate your entertaining game by introducing fir to your menu – from classy cocktails to rustic potatoes!
Read MoreLooking for a way to use that leftover Thanksgiving Turkey? Shake things up this holiday season with a game-changing twist. Serve these easy-to-make appetizers with a side of Vietnamese dipping sauce for an extra kick of flavor!
Read MoreAttention all cheese lovers! If you’re looking for recipes to satisfy all your cheesy needs, then look no further.
Read More

