Bring On the Brews This Summer: DIY Beer, Wine, & Cider

There’s nothing much better than having a drink after a long, hot day. What could make it better is drinking something that you brewed yourself. Create great drinks all on your own this season with help from these recipes for summer brews!
The following is an excerpt from Wild Fermentation by Sandor Katz. It has been adapted for the web.
Fermented Fruit Brews: Spontaneous Wine or Cider
Freshly pressed raw fruit juice spontaneously ferments easily and quickly. This is how wine has always been made, from the juice of pressed grapes; cider from pressed apples; perry from pressed pears; and so forth.
 Not every fruit neatly juices; some express thick pulps. Grapes easily release their juice when you simply squeeze them by hand or apply moderate pressure. I like to leave skins in as juice begins to ferment for red color and tannins, then strain and press them after a week or so of fermentation. It takes about 15 pounds/7 kilograms of grapes for a gallon/4 liters of juice. Apples and pears cannot be handpressed, but require a cider press, with similar proportions of fruit. You may certainly juice using an electric juicer.
If you want to ferment packaged commercial juice you can, but understand that generally the juice has been pasteurized, so its indigenous wild yeasts are gone. For best results, add to the pasteurized juice a little fresh raw organic fruit with skins as a source of yeast and bacteria.
This process, which takes only about a week, results in a mildly alcoholic beverage that is still somewhat sweet. This is the way most alcoholic beverages have been fermented through time, in open vessels, and enjoyed young. If the beverage continues to ferment in the open vessel, as the alcohol fermentation slows, vinegar organisms start to ferment the alcohol into vinegar. To continue the process and produce a dry alcoholic beverage requires protecting the fermenting juice from air, since the vinegar organisms need oxygen.
Timeframe: About 1 week
Vessel: Crock, bowl, or bucket with a broad surface area, more than 1 gallon/4 liters in capacity to allow for vigorous stirring
Ingredients (for 1 gallon/ 4 liters)
- 1 gallon/4 liters fresh grape, apple, pear, or other fruit juice (fresh is best but if you use commercial juice read labels to be sure it is pure juice and does not contain preservatives)
 Procedure
 Procedure
- Ferment the juice at room temperature, in a crock, bowl, or bucket with a broad surface area, with enough room to allow for vigorous stirring. Cover with a cloth to keep flies out but allow for air (and yeast) access.
- Stir frequently, at a minimum twice a day but more if possible. Stir vigorously. One of the ways that the stirring stimulates the process is by introducing air and oxygen, and the more vigorously you stir, the more air you mix in. Stirring also distributes airborne yeasts that land on the surface and any yeast activity, and prevents unwanted surface growth. Stir, stir, stir.
- Observe bubbling. At first you will notice a few bubbles. Keep stirring frequently and the bubbling will grow in intensity. After a week or so the bubbling will peak and begin to slow.
- Taste as the fermentation proceeds. Over the course of 10 days the stages might be described as “sweet, mildly alcoholic,” then “stronger, losing its sweetness, not at all sour,” then eventually “starts to have a sour edge.” Homebrewing can be as simple as this.
Fermented Grain Brews: Rice Beer
Saké is the most widely known example of a beverage fermented from rice, and also the most elaborate and refined in process. Sometimes saké is described as rice wine, but because the defining characteristic of beer is that it is made from grain, I think of it as rice beer. This rice beer, like chicha and most indigenous brews around the world, is opaque rather than clear, a starchy suspension like a thin gruel. Similar beverages, varying in starters, specific processes, and ingredients, are fermented all across Asia from rice and other grains.
This simple and accessible method for making your own rice brew uses as a starter what are commonly called Chinese yeast balls, widely available in Asian markets and online.
Timeframe: 5 to 10 days, depending upon temperature
Vessel: Crock, jar, or glass or ceramic bowl with a capacity of at least 1 gallon/4 liters
Ingredients (for 2 quarts/ 2 liters)
- 4 cups/1 kilogram rice
- 1 Chinese yeast ball
Procedure
- Cook the rice at normal proportions without any salt. Presoak it if you wish.
- Cool until still warm but comfortable to the touch.
- Transfer to a crock or other open vessel.
- Add water. Use about 1 quart/1 liter, and make sure it’s dechlorinated.
- Break up the rice. Use your hands to gently squeeze the rice, breaking up clumps and separating individual grains.
- Add the yeast ball. Crush it into powder with a mortar and pestle, or by pressing it with the back of a spoon against a sturdy bowl.
- Mix the powder into the rice and water. Cover the vessel with a cloth or loose-fitting lid.
- Ferment in a warm spot.
- Stir several times a day, to help redistribute and spread enzyme and yeast activity. At first, all the water you added is absorbed by the rice, but as enzymatic digestion progresses, liquefaction occurs gradually and the rice is soon floating in liquid.
- Taste. Rice beer is quite delicious throughout its development, at first very sweet and gradually more alcoholic. Ferment until most of the rice grains have sunk to the bottom. This may take just a few days in a warm environment, or as long as 2 weeks in a cool one.
- Strain through a fine-mesh colander or cheesecloth. Press it well to get out all the juice that you can. Pour a cup of water gently over the residue and press again. Try the still-flavorful pressed residue in pancakes, breads, and other cooking. Enjoy rice beer fresh like this, or . . .
- Bottle. Leave the bottles at ambient temperature for another day to carbonate, if desired.
- Drink. Refrigerate for short-term preservation or pasteurize for longer-term storage; otherwise lactic acid bacteria from the mixed culture will continue to acidify.
- Stronger. To make stronger rice beer, cook another 4 cups/1 kilogram rice, cool it, pour the rice beer over the fresh rice, and let the process repeat itself.
Variations: Cook the rice with spices . . . Add cooked sweet potato to the warm rice mash . . . Try mixing in other grains.
Recommended Reads
Read The Book

Wild Fermentation
The Flavor, Nutrition, and Craft of Live-Culture Foods, 2nd Edition
$29.95
You may like...
-
 $29.95
 -
 $24.95
 -
 $44.95


Recent Articles
Want to spice up your traditional bread recipes? This salt-rising bread recipe by fermentation expert Sandor Ellix Katz has all the simplicity, flavor, and uniqueness you’ve been searching for! The following is an excerpt from Sandor Katz’s Fermentation Journeys by Sandor Ellix Katz. It has been adapted for the web. What Is Salt-Rising Bread? Salt-rising…
Read More
Nothing says “spring” like a fresh, foraged meal! Savor the flavors of the season with this Milkweed Bud Pizza recipe.
Read More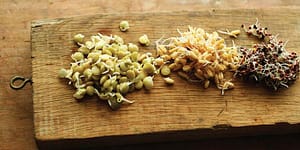
One simple and healthy way to breathe life back into your diet is by sprouting your own seeds. You can make nutrient-rich sprouts from all kinds of edible seeds right in your own kitchen. Sprouts are incredibly versatile too! You can make chickpea sprout hummus, salads, or in this case: energy bars! The following is…
Read More
What’s so great about oyster mushrooms? First, you can add them to the list of foods that can be grown indoors! They are tasty, easy to grow, multiply fast, and they love a variety of substrates, making oyster mushrooms the premium choice. The following is an excerpt from Fresh Food from Small Spaces by R. J.…
Read More
Maple is a special addition to any recipe and cozy way to enjoy the marvelous sweetness of maple. Perfect with coffee or tea and delicious everyday snacking!
Read More