A Guide to Growing Oyster Mushrooms Indoors
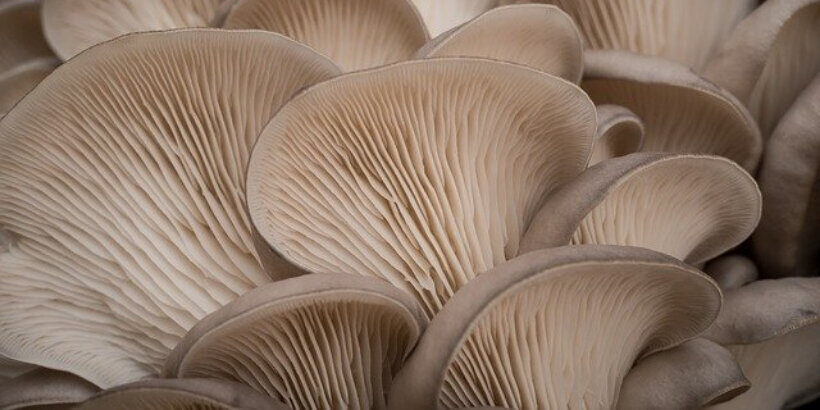
What’s so great about oyster mushrooms? First, you can add them to the list of foods that can be grown indoors!
They are tasty, easy to grow, multiply fast, and they love a variety of substrates, making oyster mushrooms the premium choice.
The following is an excerpt from Fresh Food from Small Spaces by R. J. Ruppenthal. It has been adapted for the web.
Oyster Mushrooms: The Easiest Mushrooms to Grow
Though they are accustomed naturally to growing in wood, you also can raise oyster mushrooms in a variety of other growing media, including straw or sawdust. The easiest way to begin is with a kit.
If you want to experiment on your own, then oysters give you a greater chance of success than other mushrooms.
There are dozens of varieties of oyster mushrooms, from pin-sized to trumpet-sized, so check with your kit or spore supplier to see which kinds are available and recommended for your climate. Most grow in an ideal temperature range of about 55 to 65 °F.
Growing Kits for Oyster Mushrooms
You can make your own kit using any of these materials, but I will recommend one other method that has worked well for many indoor mushroom growers.
Oyster Mushrooms: What You Need
For this you will need two milk cartons or small waxed-cardboard boxes, enough sawdust to fill them, 2 cups of whole grain flour or coffee grounds, and some oyster mushroom spawn.
The basic steps are as follows, but feel free to improvise. If sawdust is unavailable, you could also use straw for this.
-
Cut out the top of the milk cartons so that their edges are of even height. Punch several small holes in each side of both cartons.
-
Sterilizing (optional): If you are using sawdust that has already been inoculated with spawn, then do not try to sterilize it or you will kill the fungi. If you are using additional sawdust that has not been inoculated yet, then you may want to sterilize it. The easiest ways to do this are by boiling, steaming, or microwaving it. If anyone else in your household might object to cooking sawdust in the kitchen, then you might want to try this step when no one else is home. To sterilize with a microwave oven, fill a microwave-safe bowl with sawdust, plus the flour or coffee grounds, and wet down this mass with enough water so that it is the consistency of a wet sponge. You may need to do several successive batches to sterilize all of your sawdust. Nuking the sawdust on high for two minutes or until the water begins to boil off will kill any unwanted organisms and leave your kitchen smelling like either a wood shop or coffee shop. You also can boil or steam the growing medium in a pot of water in the kitchen or over a campfire, with or without a steamer basket. After it has boiled for a few minutes, turn off the heat, keep the sawdust covered, and let it return to room temperature.
-
Using non-chlorinated water, wet the sawdust until it’s thoroughly damp.
-
Then mix in your spores or inoculated material.
-
Tightly pack this damp growing medium into your milk cartons and leave them in a cellar, garage, storage locker, or dark cabinet. You can put some plastic underneath the cartons and cover them loosely with plastic if desired. If insects are a problem, then spray cooking oil around the plastic to trap them.
-
Keep the sawdust mix moistened regularly with non-chlorinated water, and in a few months your fungi should fruit repeatedly. To harvest mushrooms, twist them out gently so that their stems do not break.
Recommended Reads
Drill, Plug, Wax, Wait: 6 Simple Steps to Growing Mushrooms Outdoors
Recent Articles
Does the cold weather have you dreaming about fresh greens and colorful salad? Grow and harvest sprouts indoors to make those dreams a reality!
Read MoreWinter just got cozier! Our simple & nourishing soup is just what you need to cozy up on chilly days or nights! Delicious and nutritious, this soup is perfect for the whole family.
Read MoreIndulge in the sweet aroma of these pastry-wrapped pears! Easy to make and stunning to serve, these pastry-wrapped pears are a game-changer.
Read MoreNo heated greenhouse? No problem! Discover the secrets to thriving winter gardening without breaking the bank.
Read More

